Table of Contents
- Overview
- Caching
- Link to the component; create menu items
- How to use Tags
- Manage Events
- Configuration options
- Manage Categories
- Download Log
- Manage Messages
- Manage Watermarks
- Manage Google Photos Accounts
- Manage Email Templates
- Sync folders and images (Google Photos, Flickr, Local, Amazon S3)
- S3 Storage (Amazon S3 and compatible services)
- Google Photos - Shared Page
- Google Photos Picker API
- Flickr Pro
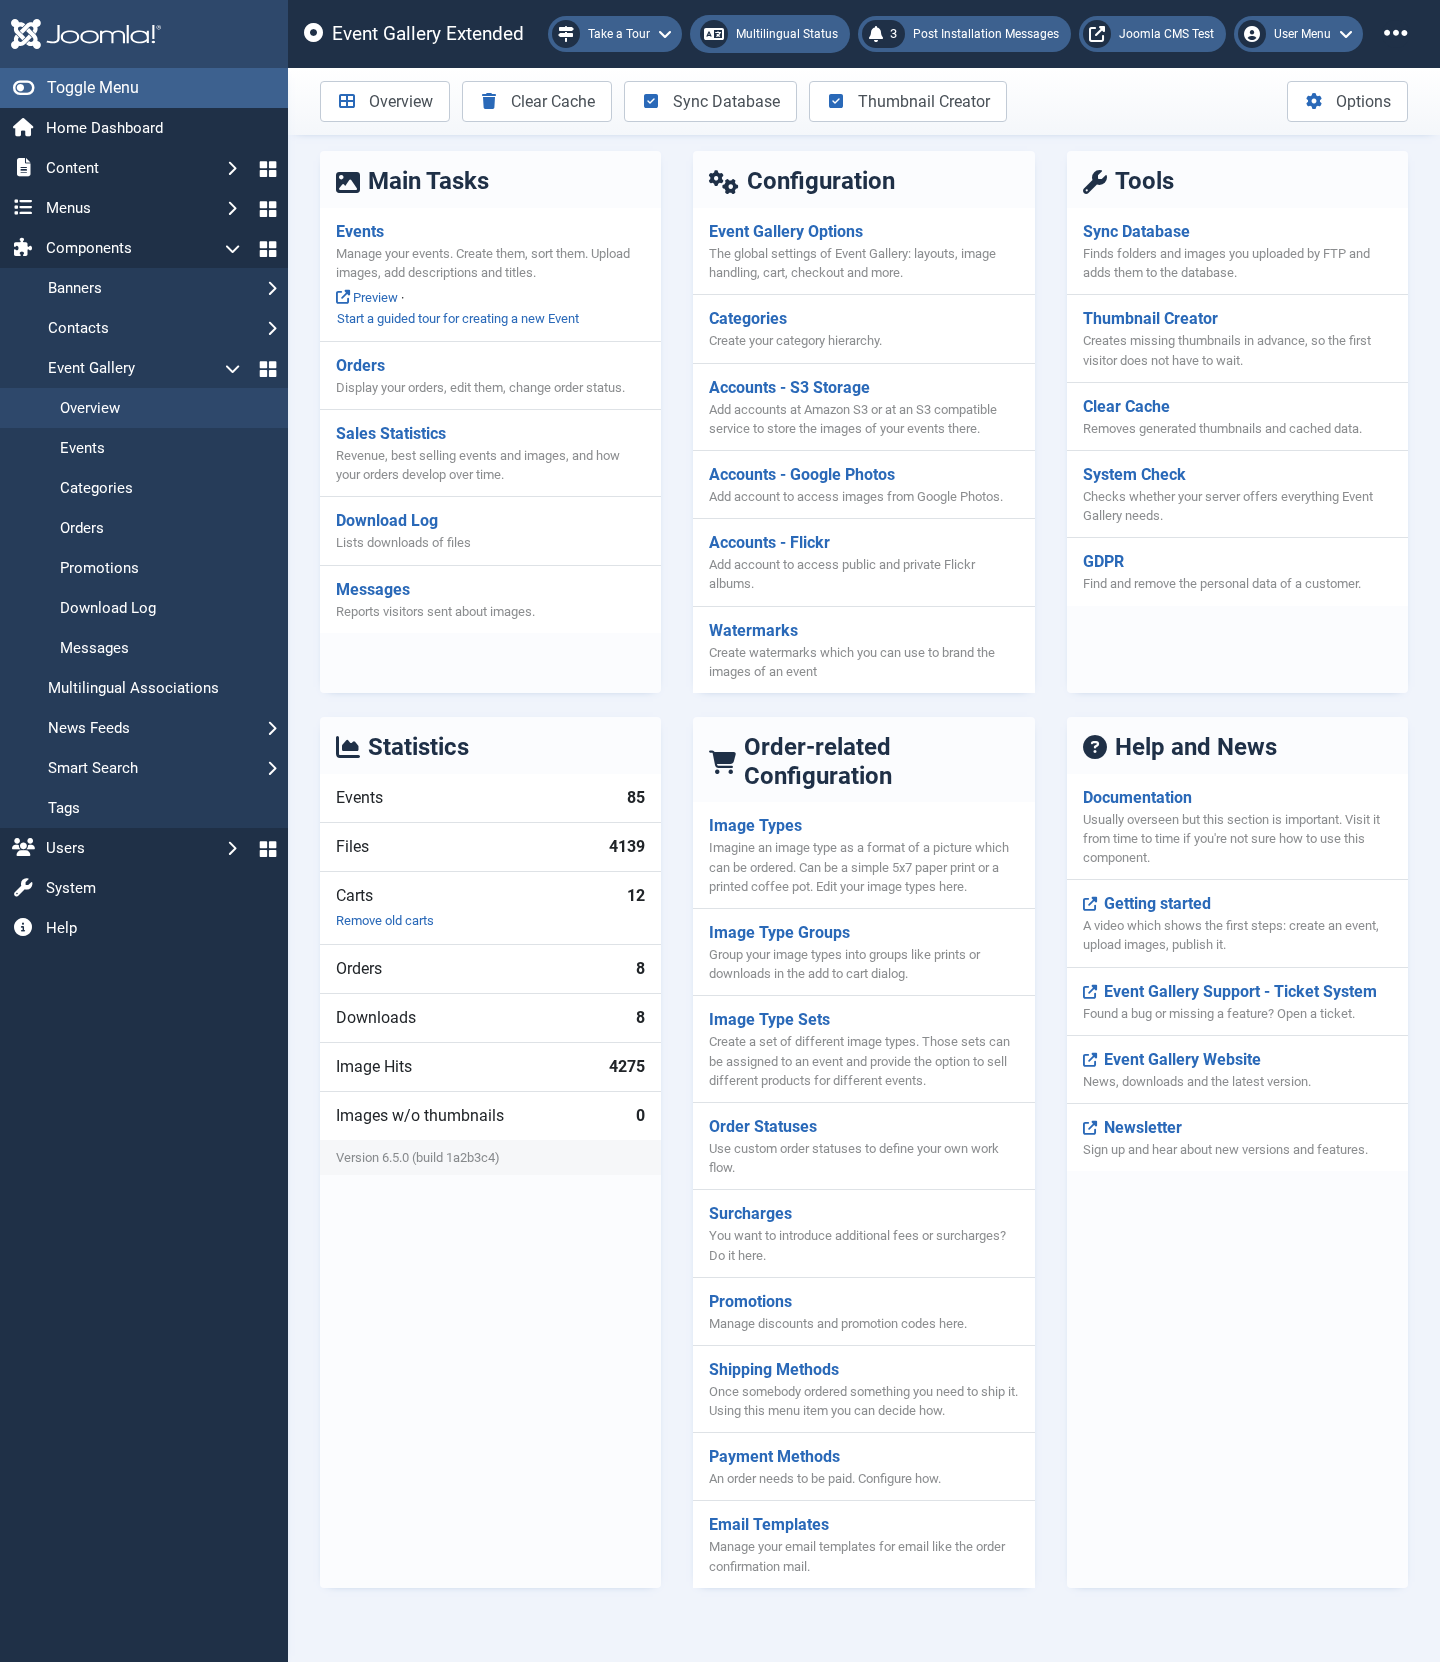
The overview page is where you land when you open Event Gallery in the backend. It leads to every part of the component. The links are grouped the same way as the Event Gallery menu on the left:
- Main Tasks
- Your events, the orders, the sales statistics, the download log and the messages visitors sent about images. Below the events you find a preview of the frontend and a guided tour which creates your first event with you.
- Configuration
- The options of the component, the categories, the accounts for S3 storage, Google Photos and Flickr, and the watermarks.
- Tools
- Sync the database, create thumbnails, clear the cache, check your server and handle the personal data of a customer (GDPR).
- Order-related Configuration
- Everything a shop needs: image types, image type groups and sets, order statuses, surcharges, promotions, shipping and payment methods and the email templates.
- Help and News
- This documentation, a getting-started video, the ticket system, the website and the newsletter.
The Statistics card counts your events, files, carts, orders, downloads and image hits. The files are the images whose event still exists. Should images have lost their event - a folder deleted or renamed outside Event Gallery - a clean-up link appears below the number and says how many database entries that are; removing them is what the link does. Their titles, captions and prices go with them, which is why Event Gallery keeps those entries until you say so. The second clean-up link removes carts nobody touched for 30 days. Both ask before they remove anything, and neither can be undone. If thumbnails are missing, the page tells you at the top and links to the thumbnail creator.
The free version shows what Event Gallery Extended adds at the top of the page, and marks the areas which are limited without it.
On a phone or a narrow window the cards stack below each other.
The top tool bar provides the following options:
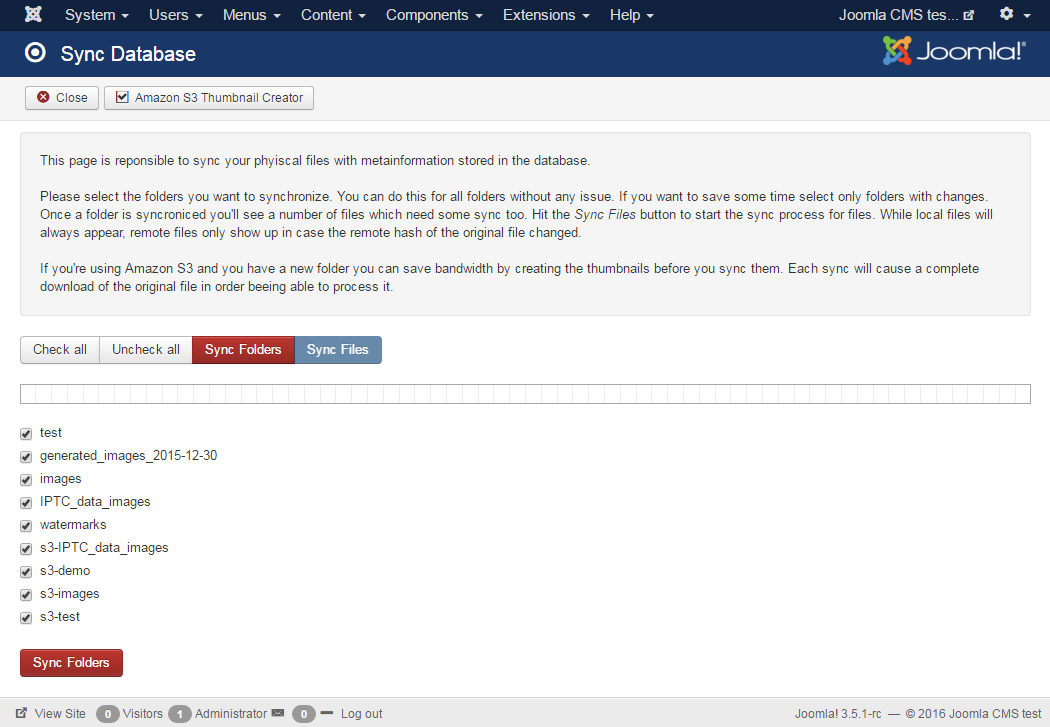
You can do the upload using FTP or the built-in image uploader. Since this component uses the databases to store information about files it needs to be updated once you change something directly at file system level. You can add/remove files and folders. By hitting the sync button added folders and files get added to the database while removed files/folder get removed. Finally, the database is in sync with the file system. If you try to upload using FTP put your images into a new folder below /images/eventgallery/.
Make sure your folder names do not include special characters like umlauts, dots or anything like this. Otherwise, you will encounter sync issues.
The sync process will handle your Amazon S3 folders as well.
Each event is listed by its name, with the folder it lives in and its date underneath; you can search for either. Above the list you find a search field, a filter and an order. By default the newest events come first; events which are not in the database yet have no date, so they sit at the end - use the filter to get straight to them. If you store images in more than one place, the filter also lets you show only the local events or only those of one S3 storage. takes what is on screen, so you can narrow the list first and then tick everything it left over; what you ticked before stays ticked even when the filter hides it.
Tick the events you want to bring up to date - new ones are ticked for you - and press . The page then runs two phases one after the other. Synchronize Events looks for the files which need to be synced; for local files that is all of them, Amazon S3 files only appear if their hash has changed or the local database does not know the hash yet. Synchronize Images then reads those files and updates their metadata in the database. This involves some EXIF data and, most importantly, the plain width and height of the image. If you’re syncing S3 images please keep in mind that this process will temporarily download every file to read the necessary data from it.
Because that second phase is the expensive one, there is a second button, . It runs the first phase alone: new events are created, files which are gone are removed and new ones are added, so the database knows the right events and files afterwards - it only does not know the dimensions of the images yet. Use it to see how much work the second phase would be before you start it.
While the sync runs you can follow it per event: an event fills up green from the left and counts its images underneath, and it says done when its last image is through. ends the run - what is already done stays done. At the end the page says how many events and images it processed and names everything which did not work, with the reason.
If you want to automate the sync process you can run php cli/joomla.php eventgallery:sync to do the sync job. See CLI - Command Line Interface for the available commands and options.
You can use this script as part of a CRON job.
This is useful if you just want to add images daily, or you have an ongoing event.
Make sure the uploads and the sync job do not collide.
In the top toolbar you’ll find a new button Thumbnail Creator. Use this button to create your thumbnails if you store your images in an Amazon S3 bucket or use local images and there are some missing.
The list carries the same search field, filter and order as the sync page, with the newest event first.
Tick the events you want to work on - nothing is ticked for you here, because creating thumbnails is expensive - and press . The page runs two phases: Find missing thumbnails looks for what is missing, Create thumbnails then creates it. A thumbnail counts as missing on two criteria: it does not exist at all, or it exists but the database does not know it.
If you only want to know how much work there would be, press . That runs the first phase alone and tells you per event how many images are missing a thumbnail.
The option applies to events stored on S3 only. When it is on and a thumbnail already exists in the bucket, its hash is written into the database instead of the thumbnail being calculated again. This is very useful if you run two servers with one set of S3 buckets and avoids calculating the thumbnails twice. Local events have no such hashes, so the option does nothing for them.
Creating thumbnails takes a long time, especially with S3, where the upload is slow. Since an image might take about 25-35s, please make sure your server’s max execution time is set to a higher value than 30s! While it runs you can follow it per event: an event fills up green from the left and counts its images underneath, and it says done when its last thumbnail is created. ends the run - what is already created stays created. At the end the page says how many events and images it processed and names every image it could not do, with the reason; press again to retry those.
![[Note]](/media/com_docimport/admonition/note.png) | Note |
|---|---|
|
On my server it took about 5-6 hours to create thumbnails for 2000 images in an S3 bucket. The sync process runs in the browser with four parallel workers. The CLI script uses just one. |
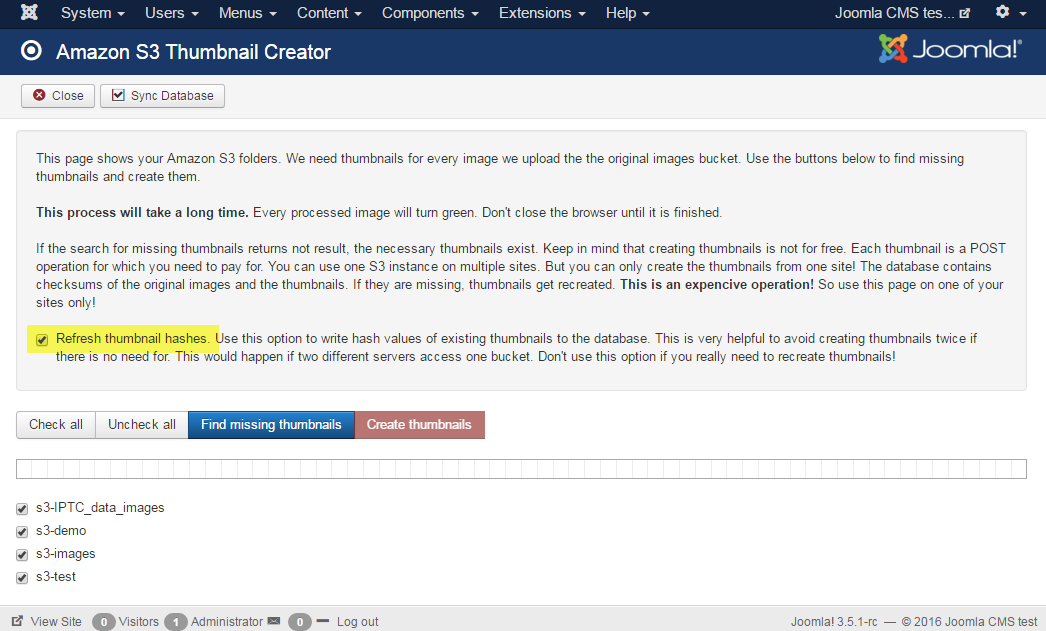
The component caches all calculated images, the result of requests to Flickr and Google Photos and some more stuff. The page lists what is in the cache, sorted by kind and with the number of files and the size of each entry; entries which hold nothing are left out. The caches of Flickr, Google Photos and the general one come first, because they are one entry each; the thumbnails, which have one entry per event, come last. There is one entry per event in the image cache, so the list carries a search field and an order; the largest entry comes first, which is usually the one worth emptying.
Tick what you want to empty and press . The page asks you once before it starts, because what it removes has to be created again when it is needed, and then works through your selection one entry at a time. At the end it says what it emptied and names anything it could not, with the reason.
Keep in mind that refreshing the cache might be expensive. Please note that just because you remove all the cached images your browser might still load images from the local browser cache. Don’t forget to clear that too. If you remove cached responses for Google Photos and Flickr requests the next request on your site will load the latest data from those remote services. Use this if you change something directly in a Google Photos/Flickr album.
| Note |
|---|---|
|
You can manually clear the Event Gallery cache by deleting all com_eventgallery* folders in the Joomla! Cache folder /cache and the folder which contains generated thumbnails /images/eventgallery_generated. The cache folders are com_eventgallery for general data, com_eventgallery_flickr for Flickr responses, and com_eventgallery_googlephotos and com_eventgallery_googlephotos_sharedpage for the two Google Photos integrations. |